
How to Apply Reflective Vinyl for Better Night Visibility
A practical guide to choosing, preparing, and applying reflective vinyl for commercial signs, fleet graphics, parking lots, and low-light safety needs around San Jose.
Key takeaways
- Reflective vinyl uses microprisms or glass beads to bounce light back toward headlights, making signs easier to see after dark.
- The right grade depends on the use case: parking lots, storefront decals, fleet markings, and traffic-control signs do not all need the same material.
- Surface preparation - cleaning with isopropyl alcohol and confirming the substrate is smooth, dry, and sound - is the most important step for long-term adhesion.
- Dry application is best for smaller flat panels, while wet application can help with larger graphics, vehicle curves, and alignment-sensitive layouts.
- Allow 24-48 hours of curing time before washing, pressure, or heavy handling, especially during cool or damp Bay Area weather.
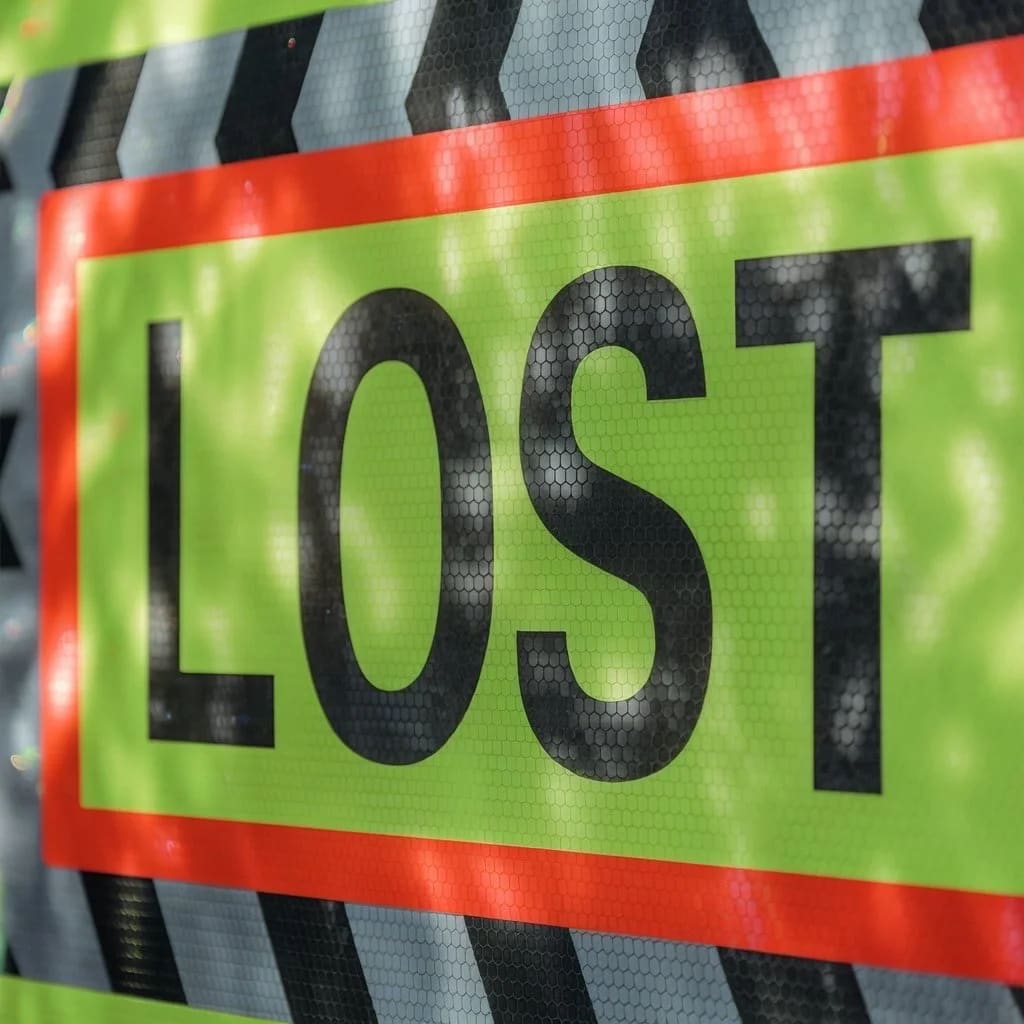
Reflective vinyl can turn an ordinary sign, decal, or vehicle marking into something that works after dark. For San Jose businesses, that matters on dim parking lots, warehouse yards, service vehicles, storefront windows, loading areas, and commercial corridors where customers may arrive before sunrise or after closing. The material is useful, but it is not magic: the grade, surface, weather, and installation technique all affect how long it lasts and how well it reflects.
This guide explains how reflective vinyl works, how to choose the right film, and how to apply it cleanly on common sign-shop projects around San Jose, Santa Clara, Sunnyvale, Mountain View, Cupertino, Milpitas, Fremont, and Palo Alto.
What makes reflective vinyl work?
Reflective vinyl contains glass beads or microprisms built into a film layer. When headlights, flashlights, or site lighting hit the surface, those elements send light back toward the source. That retroreflective effect is what makes stop signs, fire-lane signs, delivery vehicle markings, and safety decals appear bright at night.
The technology has improved over time. According to 3M, newer full-cube prismatic films can return substantially more light than older prism designs. For a business sign or safety marker, that can mean better legibility from a moving vehicle, a driveway entrance, or a darker corner of a property.
Which grade of reflective vinyl should you choose?
Not every project needs the highest grade. A reflective address number on a storefront, a reserved parking sign in a private lot, and a traffic-control panel near a driveway all have different visibility expectations. According to industry specifications, reflective sheeting is commonly grouped into three main categories:
Engineer Grade (Type I)
Engineer Grade is the entry-level option and uses glass beads to reflect light. It is often suitable for private parking areas, warehouse interiors, simple directional markers, and non-critical commercial signs where moderate night visibility is enough. It is generally more budget-friendly, but it is not the best choice for high-speed approaches or safety-critical messaging.
High Intensity Prismatic (Type IV)
High Intensity Prismatic, often called HIP, uses prismatic cells that reflect more light at wider viewing angles. This grade is a strong option for custom safety signs, parking-lot signs, loading-zone markers, and directional signage that drivers need to read from a distance. It is commonly used where reliable night visibility matters but Diamond Grade is more than the project requires.
Diamond Grade (Type XI)
Diamond Grade is the most efficient option and is typically reserved for demanding traffic-control or high-visibility safety applications. For most storefront and private-property signage, it may be unnecessary, but it can make sense for critical driveway warnings, high-risk circulation areas, or signs that need maximum brightness in low light.
What tools and materials do you need?
Before you start, gather the right tools and set up a clean workspace. Reflective films are less forgiving than standard calendared vinyl, so dust, rough edges, and rushed squeegee work show up quickly.
- Reflective vinyl (appropriate grade for your application)
- Squeegee or application tool
- Isopropyl alcohol (70% or higher) and lint-free cloths
- Sharp utility knife or scissors
- Measuring tape and masking tape
- Heat gun (for curved surfaces or finishing)
- Application fluid (for wet applications)
How do you prepare the surface?
Surface preparation is the difference between a clean installation and a decal that lifts at the edges after the first few weeks. The surface should be smooth, stable, dry, and free of residue before the backing paper comes off.
Cleaning: Wipe the surface with isopropyl alcohol and a lint-free cloth to remove dirt, oil, wax, and road film. Avoid household cleaners that leave residue, especially on glass, painted panels, and vehicle doors.
Smoothing: Address rust, peeling paint, loose powder coating, raised fastener edges, and chipped sign faces before applying vinyl. Reflective film will telegraph bumps, and weak paint can fail underneath the adhesive.
Drying: Make sure the surface is completely dry. Morning condensation, coastal fog, and cool shaded walls can keep moisture on sign panels longer than expected in the Bay Area.
Temperature: Check the product data sheet for the specific film you are using. Many reflective films need a moderate application temperature to bond correctly, so a cold loading dock or hot metal panel in direct sun can make the work harder.
How do you apply reflective vinyl correctly?
There are two primary application methods: dry and wet. The right choice depends on the size of the graphic, the surface shape, and how much alignment flexibility you need.
Dry application (best for flat surfaces)
Dry application works well for small to medium-sized pieces on flat panels, aluminum signs, doors, glass, and simple parking-lot markers:
- Position the vinyl using masking tape without removing the backing paper. This lets you check height, spacing, and alignment before committing.
- Create a hinge by taping one edge, then lift the opposite side to remove the backing paper.
- Slowly lower the vinyl while using a squeegee to press from the center outward, pushing air toward the edges.
- Keep steady pressure on the squeegee. If small bubbles remain, work them toward the nearest edge or release trapped air with a fine pin.
Wet application (best for curves and large areas)
Wet application provides more working time and can help with large graphics, alignment-sensitive decals, and certain vehicle graphics. It is useful when applying reflective panels to service vehicles that operate around San Jose, Santa Clara, Fremont, and other South Bay routes:
- Lightly mist both the adhesive side of the vinyl and the target surface with application fluid.
- Position the vinyl while the fluid allows limited movement.
- Use a squeegee to press out the fluid and air, working from center to edges.
- Allow extra drying time before the vinyl fully adheres, and avoid washing or heavy handling during that period.
What should you do after application?
Allow the vinyl to cure for 24-48 hours before washing, applying pressure, or exposing it to heavy handling. This curing period lets the adhesive reach full bond strength. Cool evenings, damp mornings, and shaded exterior surfaces may require more patience.
For curved surfaces or edges that need extra adhesion, gently warm the vinyl with a heat gun on low settings and apply firm, even pressure. The goal is to help the material conform, not to overheat or stretch it. On vehicle curves, door seams, and panel edges, follow the film manufacturer's post-heating guidance.
If the reflective graphic is part of a permanent exterior sign, coordinate placement before installation. Property managers, landlords, and business parks in San Jose or nearby cities may have rules about sign placement, colors, or window coverage, even when the vinyl itself is simple to install.
How do you maintain reflective vinyl?
Regular maintenance helps reflective vinyl stay visible and clean:
- Cleaning: Use mild soap and water. Avoid abrasive pads, harsh solvents, and pressure washers at close range.
- Inspection: Check for lifting edges, scratches, impact damage, and fading, especially on exterior signs and fleet vehicles.
- Repairs: Address lifting edges early with gentle heat and firm pressure. Replace sections that are damaged enough to reduce visibility.
- Lighting checks: View the sign or decal at night from the normal approach direction. A graphic can look fine in daylight but still need better contrast, placement, or lighting after dark.
What are common applications for reflective vinyl?
Reflective vinyl serves a wide range of visibility and safety needs for commercial properties, storefronts, and vehicles.
Commercial and safety signage
Parking lot signs, reserved-space markers, loading-zone signs, gate instructions, address panels, and custom aluminum signs all benefit from reflective materials. In business parks, retail centers, auto shops, restaurants, and medical offices, reflective signage helps visitors and vendors navigate after dark.
Vehicle graphics
Service vans, delivery vehicles, contractor trucks, shuttle vehicles, and maintenance fleets can use reflective striping or decals to improve side and rear visibility. For vehicles moving between San Jose, Sunnyvale, Santa Clara, Palo Alto, Mountain View, Milpitas, and Fremont, reflective elements can support both branding and practical safety.
Personal safety gear
High-visibility workwear, helmets, cycling gear, backpacks, and jobsite equipment often use reflective vinyl elements. These applications are smaller than a sign face, but the same basic rules apply: choose a compatible film, clean the surface, and allow the adhesive to cure.
Window and storefront accents
Reflective vinyl can also be used selectively on windows, doors, and storefront decals when a business wants after-hours visibility without adding a fully illuminated sign. Keep the layout readable, avoid covering too much glass, and confirm any landlord or property guidelines before installation.
How do you troubleshoot common issues?
Air bubbles
Use steady squeegee pressure from the center outward. For stubborn bubbles, puncture with a fine pin and smooth the area flat. Large bubbles usually point to rushed application, dust, or trapped application fluid.
Peeling edges
Peeling edges are usually caused by residue, moisture, weak paint, sharp corners, or insufficient pressure during installation. Reapply using gentle heat and firm pressure. If the edge keeps lifting, the section may need to be trimmed, sealed, or replaced.
Misalignment
Use the hinge method and masking tape to verify position before removing the backing. For wet applications, use the working time to align the graphic carefully before squeegeeing out the fluid.
Dull nighttime reflection
If the vinyl does not appear bright at night, check the viewing angle, headlight approach, surface contamination, and material grade. Sometimes the film is working, but the sign is placed where headlights do not hit it directly enough to return light to the driver.
Ready to improve visibility on your next project?
Reflective vinyl is a practical way to improve night visibility for signs, vehicles, windows, and safety decals. The best results come from matching the material to the job, preparing the surface correctly, and giving the adhesive time to cure.
If you need help choosing reflective materials or want professional installation services in San Jose or the surrounding South Bay, start your project with San Jo Sign Co. We can help match the right reflective vinyl grade to your sign, vehicle, or property visibility need.