
Mastering San Jose Custom Signage with the Mars 130 Laser Engraver
A practical guide to dialing in a 130-watt CO2 laser for custom signs on acrylic, wood, coated metal, glass, and more—with San Jose production notes on material choice, finish quality, and real-world installation needs.
Key takeaways
- The Mars 130 pairs a 130-watt CO2 laser with a 1300×900mm work area, which is useful for larger lobby signs, panels, plaques, and retail displays.
- Wood engraving often starts around 50–70% power at 300–500 mm/s; cast acrylic usually needs lower power and faster movement for a clean frosted mark.
- For San Jose storefront and office signage, material choice should account for visibility, mounting method, sunlight exposure, and landlord finish standards.
- Test cuts are not optional. Acrylic, plywood, hardwood, and coated metal can vary enough between batches to change the final result.
- Reliable production depends on clean optics, stable cooling, active ventilation, and never leaving a CO2 laser unattended while it runs.
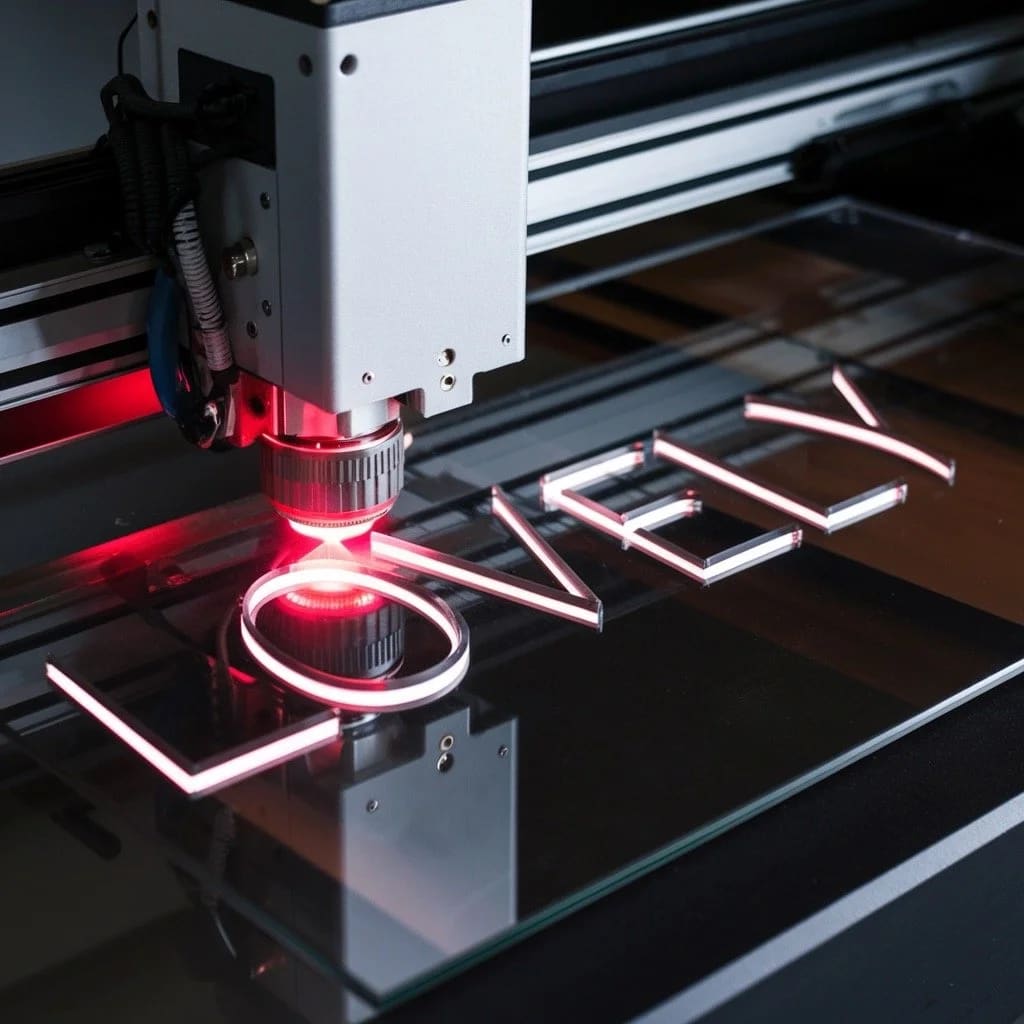
Laser engraving is one of the cleanest ways to produce crisp custom acrylic signs, wood plaques, directional markers, office nameplates, and branded display pieces. The Mars 130 laser engraver, with its 130-watt CO2 tube and 1300×900mm work area, is large enough for many commercial sign formats while still precise enough for small typography and detailed logos.
For San Jose businesses, the value is not just the cut line. A sign has to read well from a sidewalk, fit a landlord's finish requirements, survive daily handling, and look intentional in a lobby, retail window, conference room, or trade-show booth. Good laser work starts with power and speed settings, but it also depends on choosing the right substrate for the environment.
What makes the Mars 130 a strong choice for signage production?
The Mars 130 combines a larger bed size with enough power for day-to-day sign-shop production. It can cut and engrave wood, acrylic, leather, glass, coated metals, paper, fabric, and many plastics with fine detail, which makes it useful for prototypes, short runs, replacement panels, and finished customer-facing signs.
Specifications that matter for signage work:
- Laser type: CO2 (10,600nm wavelength)
- Power output: 130 watts
- Work area: 1300mm × 900mm (approximately 51" × 35")
- Resolution: Up to 1000 DPI
- Compatible materials: Wood, acrylic, leather, glass, coated metal, fabric, paper, and most plastics
That work envelope helps with the types of jobs common around San Jose, Santa Clara, Sunnyvale, Mountain View, Cupertino, Palo Alto, Milpitas, and Fremont: lobby logo panels, tenant plaques, retail counter signs, wayfinding inserts, event displays, engraved donor pieces, and branded acrylic elements that need clean edges without a long fabrication cycle.
Which materials work best for laser-engraved signage?
Material selection determines the look, durability, and installation options for the finished sign. Each substrate responds differently to laser energy, and each one behaves differently once it is mounted in a storefront, office suite, restaurant, clinic, school, or event space.
- Wood: Natural grain creates warmth and contrast for plaques, interior signs, menus, and presentation pieces. Cherry, maple, and alder usually engrave cleanly; oak's open grain can make fine detail look uneven. According to Epilog Laser's settings guide, harder woods generally need more power but can produce deeper, darker marks.
- Acrylic: Cast acrylic engraves to a bright frosted mark, which works well for lobby logos, illuminated panels, awards, and dimensional lettering. Extruded acrylic is often better for cutting than engraving because it does not frost as strongly.
- Glass: Laser engraving creates a subtle frosted finish for interior panels, awards, and decorative branding. Lower power helps reduce cracking and edge chipping.
- Coated metal: With the right marking compound or coating, the Mars 130 can produce durable marks for custom aluminum signs, control labels, equipment tags, and nameplates.
- Leather: Leather can add a premium texture for hospitality, retail, and branded presentation pieces, but it burns quickly if power is too high.
- Plastics: Plastic performance varies widely. Acrylic is laser-friendly; ABS can melt; PVC should not be laser cut because it releases hazardous chlorine gas.
How should you set up the Mars 130 before engraving?
Clean setup prevents wasted material, smoky edges, inconsistent depth, and jobs that look good on screen but fail on the table. Before running production work, check the machine, the material, and the final use case.
Hardware preparation checklist
- Place the machine on a stable, level surface
- Verify the honeycomb bed is aligned and the laser head moves freely
- Clean the focus lens and mirrors (residue affects beam quality)
- Check that the water cooling system is circulating and at proper temperature
- Confirm exhaust ventilation is active—especially critical when cutting plastics
Software and file setup
The Mars 130 works with design software including CorelDRAW, Adobe Illustrator, and AutoCAD. Import clean SVG or DXF artwork, confirm scale, convert fonts when needed, and separate cut lines from engraving fills before sending the job to the laser control software.
For commercial signage, file setup should also account for mounting holes, standoff placement, safe margins around small text, and whether the finished piece will be viewed up close or from across a lobby, parking lot, or retail aisle.
Safety requirements (non-negotiable)
CO2 laser operation requires consistent safety practices, especially in a production setting where multiple materials may be cut in the same day:
- Wear laser-rated protective eyewear appropriate for 10.6μm wavelength
- Ensure adequate ventilation—laser cutting produces fumes, especially from plastics
- Keep a fire extinguisher accessible; never leave the machine unattended during operation
- Avoid reflective materials that can redirect the beam unpredictably
What are the optimal settings for different materials?
The relationship between power, speed, focus, and airflow determines engraving quality. As OMTech notes in their laser settings guide, test on scrap material first because even the same material type can change between batches, suppliers, colors, and thicknesses.
Wood: balancing depth and contrast
- Power: 50–70%
- Speed: 300–500 mm/s
- Focus: At surface for fine detail; slightly below for deeper cuts
Wood chars quickly at high power settings. Softer woods such as pine and basswood need less power than hardwoods such as walnut or maple. Run the grain parallel to the X-axis when possible for more consistent marks across the engraving path. For interior San Jose office plaques or restaurant signs, test the finish as well as the raw wood because stain and clear coat can change contrast.
Acrylic: achieving frost without distortion
- Power: 30–50%
- Speed: 400–600 mm/s
- Focus: At surface for clear acrylic; 1.5mm below surface for smoother frost
Cast acrylic produces the strongest white frost contrast. Lowering focus slightly can help blend raster lines for a smoother appearance. For cutting, slower speeds and higher power can create a cleaner, flame-polished edge. Acrylic is a strong choice for lobby signage around business parks, medical offices, retail counters, and tech offices where sharp edges and a modern finish matter.
Metal (with coating): creating permanent marks
- Power: 80–100%
- Speed: 200–300 mm/s
- Focus: At surface, with engraving paste or marking compound applied
CO2 lasers cannot engrave bare metal directly. Apply a specialty marking compound, let it dry completely, then laser through it. The heat bonds the compound to the metal surface. This approach is useful for equipment tags, suite labels, donor plaques, and small custom aluminum signs that need crisp text and long-term legibility.
Glass: frosting without fracturing
- Power: 10–30%
- Speed: 400–600 mm/s
- Focus: Slightly above the surface
Glass fractures rather than vaporizes when laser engraved, which creates the frosted appearance. A thin layer of liquid dish soap or a wet paper towel over the engraving area can help reduce chipping and produce smoother results. Use restraint: a subtle mark often looks better than an overworked one, especially on interior glass and award pieces.
Leather: precision without scorching
- Power: 20–40%
- Speed: 300–500 mm/s
- Focus: Slightly above surface for softer marks
Leather burns easily with excessive exposure. Keep power low, watch smoke buildup, and test small areas before committing to a finished piece. Slightly moist leather can engrave more evenly than dry leather, but every hide and finish behaves differently.
Plastics: handling material variation
- Power: 10–50% (varies significantly by plastic type)
- Speed: 400–700 mm/s
- Focus: At or slightly above surface
Plastic properties vary dramatically. ABS melts more readily than acrylic; PVC releases toxic chlorine gas and should never be laser cut. Always verify material composition before processing, especially when a customer supplies material or a replacement panel has to match an older sign.
How do San Jose installation conditions affect laser-engraved signs?
A laser-perfect panel still has to work in the field. Around San Jose and the South Bay, signs may sit behind warm storefront glass, near busy sidewalks, inside air-conditioned office suites, or in shared commercial buildings where property managers care about fasteners, finishes, and wall protection.
Before choosing a laser-engraved material, think through:
- Viewing distance: Fine engraving works for close-up plaques, but storefront and corridor signs need larger type and stronger contrast.
- Sun exposure: Acrylic color, adhesive choice, and mounting method matter more when a sign faces direct afternoon light.
- Mounting surface: Painted drywall, glass, tile, stucco, and metal frames all call for different hardware or adhesive planning.
- Landlord coordination: Many retail centers and office buildings require approval of sign size, color, finish, or attachment method before installation.
- Replacement needs: Multi-tenant properties in Palo Alto, Santa Clara, Sunnyvale, and Mountain View often benefit from repeatable files and documented settings so future panels match the first run.
What advanced techniques improve signage quality?
Beyond basic settings, a few production habits make laser-engraved signs look more finished and easier to install.
Layered engraving for dimensional effects
Multiple passes at different power levels can create depth and dimension. Start with lower power for outlines or fine detail, then increase power for deeper background areas. This works especially well for dimensional wood signs, relief effects, and display pieces where the logo should have more presence without adding separate layers.
High-resolution photo engraving
For photographs and complex images, use at least 300 DPI resolution with dithering enabled. Convert images to grayscale and adjust contrast before importing. Wood responds particularly well to photo engraving because its natural grain adds tonal variation, but the image should still be simplified enough to read at the final display distance.
Vector vs. raster mode selection
Use vector mode for cut paths, hairline borders, and clean outlines. Use raster mode for fills, shading, photos, and engraved logo areas. Many signage projects combine both: vector-cut acrylic shapes with raster-engraved text, or wood panels with a cut perimeter and engraved interior detail.
Masking and finishing for cleaner handoff
Masking can reduce smoke staining on wood and acrylic, especially on light-colored materials. After engraving, remove residue carefully, polish exposed edges when appropriate, and document the final settings. That documentation matters when a San Jose business opens a second location in Cupertino, Milpitas, or Fremont and needs matching signage months later.
How do you troubleshoot common engraving problems?
Even with careful setup, problems happen. The fastest fix is to identify whether the issue comes from settings, focus, material, airflow, or dirty optics.
- Burn marks or charring: Reduce power, increase speed, improve airflow, or mask the material with transfer tape.
- Uneven engraving depth: Check bed alignment and material flatness. Warped material will not stay in focus across the full panel.
- Inconsistent results between jobs: Clean the lens and mirrors, recalibrate focus, and confirm the same supplier, thickness, color, and finish were used.
- Rough or jagged cut edges: Adjust speed and power, check for a dirty lens, and confirm the artwork is using clean vector paths.
- Weak contrast: Test a slower pass, a different material color, or a different engraving direction before assuming the artwork is the problem.
What maintenance keeps the Mars 130 running reliably?
Routine maintenance protects the machine and the finished work. It also keeps repeat orders consistent, which matters when producing suites of signs for offices, campuses, property managers, and retail groups across the South Bay.
After every use
- Clean the focus lens and mirrors with lens cleaner and lint-free wipes
- Remove debris from the honeycomb bed and work area
- Empty the exhaust system's debris collection
Weekly checks
- Inspect cooling water level and clarity—replace if cloudy
- Check belt tension and lubricate rails if needed
- Verify mirror alignment with test fire pattern
Extending laser tube life
CO2 laser tubes have finite lifespans, but proper care helps maintain output. Avoid running at maximum power for extended periods. Keep cooling water in the recommended range, watch for output drop-off, and treat sudden setting changes as a sign to inspect optics, alignment, cooling, and material before blaming the file.
Need laser-engraved signage for a San Jose business?
The Mars 130 laser engraver supports a wide range of custom signage work: acrylic lobby signs, engraved wood panels, coated metal nameplates, retail displays, directional inserts, event pieces, and branded details for offices and storefronts. Strong results come from matching the material to the setting, dialing in the laser methodically, and planning the finished sign around how it will be installed and seen.
Whether the project is a single office plaque or a repeatable sign package for locations in San Jose, Palo Alto, Santa Clara, Sunnyvale, Mountain View, Cupertino, Milpitas, or Fremont, the fundamentals stay the same: test first, document what works, and keep the final environment in mind.
Need professional laser-cut signage for your South Bay business? San Jo Sign Co produces custom acrylic, wood, and metal signs with precision laser technology. Start your project or contact our team to discuss your signage requirements.