
Mastering Glass Etching: A San Jose Guide to Elegant Glass Signs
From San Jose lobby logos to privacy panels and storefront glass, etching gives commercial spaces a permanent, polished look. Learn which method fits your sign, budget, and installation conditions.
Key takeaways
- Chemical etching is the most accessible option for small DIY projects and simple decorative glass.
- Sandblasting produces the deepest, cleanest frosted finish for commercial glass signs and privacy panels.
- Laser etching is useful for precise artwork and repeatable details, but it usually creates a surface-level mark.
- Etched glass is permanent, so confirm artwork, placement, and landlord approvals before production.
- Clear, frosted, and tinted glass usually etch well; thin, flawed, coated, or stressed glass needs extra caution.
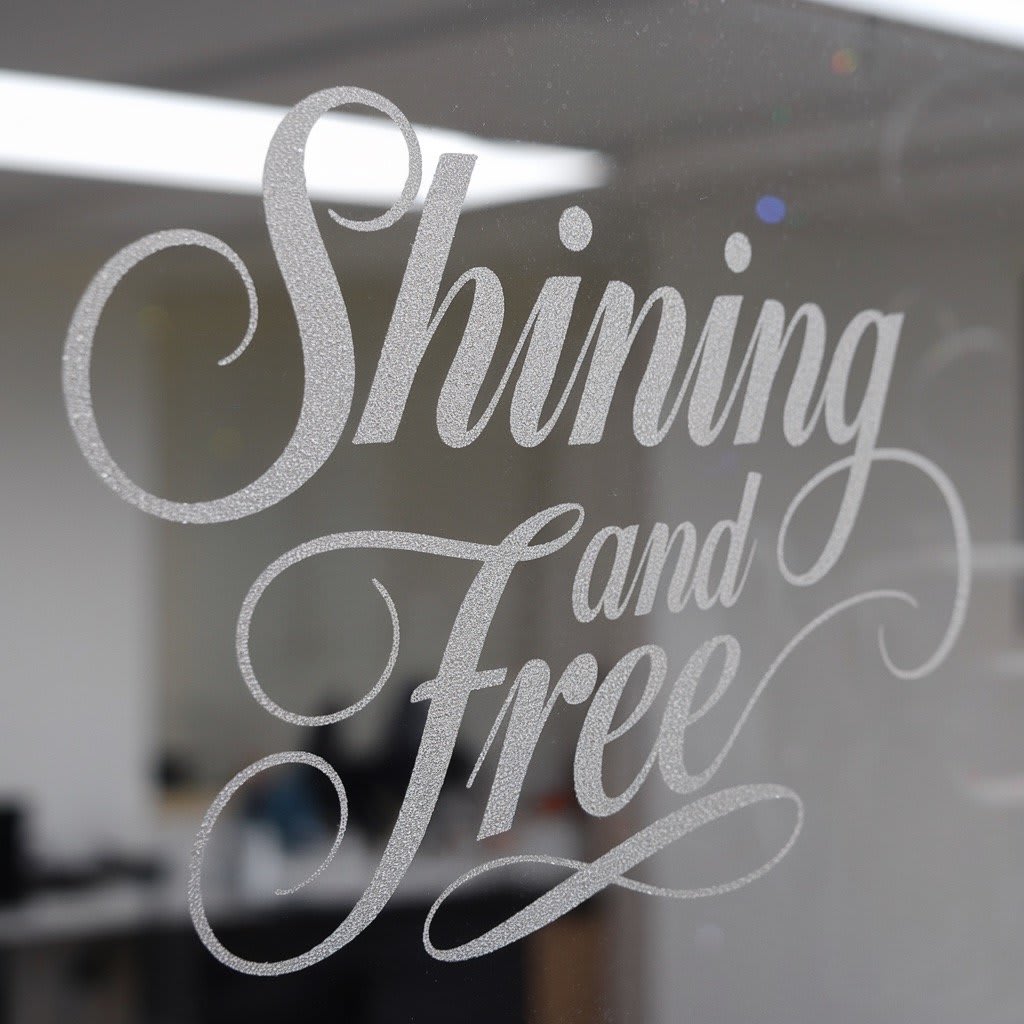
Glass signs have a quiet authority that works especially well in professional spaces. A frosted logo on a reception wall, privacy banding on a conference room, or etched address panel at a storefront can make a business feel established without turning the glass into a loud advertisement.
For San Jose offices, retail spaces, restaurants, clinics, and multi-tenant buildings, etched glass also solves practical problems. It can add privacy while keeping natural light, identify a suite without blocking visibility, and meet landlord expectations for a clean, durable finish. This guide explains the main glass etching methods, where each one fits, and what to think through before ordering or attempting the work yourself.
What is glass etching and how does it work?
Glass etching creates patterns, lettering, textures, or artwork by removing a thin layer from the glass surface. The treated area becomes frosted or matte, which creates contrast against the surrounding clear glass.
The effect can be subtle or bold depending on the design. A small etched logo may look refined in a Palo Alto office lobby, while a wider frosted band can improve privacy for a Santa Clara conference room or a Mountain View street-facing studio.
Most etched glass work falls into three categories: chemical etching, abrasive etching (sandblasting), and laser etching. Each method has different strengths, limitations, equipment needs, and finish quality.
Which glass etching technique should you choose?
The right method depends on the size of the sign, the finish you want, how the glass will be cleaned, and whether the piece is decorative, directional, privacy-focused, or part of a storefront identity system.
Chemical etching: best for DIY and small projects
Chemical etching uses etching cream to dull the exposed glass surface. It is the most accessible method for beginners because the setup is simple and the process can produce consistent results on small pieces.
Materials needed:
- Etching cream made for glass
- Stencils or masking tape
- Protective gloves and safety glasses
- Brushes or applicators
Advantages: Simple setup, lower material cost, and a good fit for decorative panels, small glass nameplates, sample pieces, and simple stencil work.
Limitations: Surface-level finish only, careful chemical handling required, and not ideal for large commercial signs, installed storefront glass, or high-visibility branding.
Sandblasting: best for commercial signage
Abrasive etching, commonly called sandblasting, propels high-pressure abrasive particles such as glass beads or aluminum oxide against the surface. This creates a deeper, more controlled frosted finish and is often the preferred choice for professional sign shops and commercial applications.
Materials needed:
- Sandblasting unit
- Abrasive material (aluminum oxide grit is common)
- Air compressor (90-100 psi)
- Protective gear (goggles, mask, gloves)
- Stencils or masking film
- Sandblasting cabinet
Advantages: Clean professional finish, deeper texture, strong control over opacity, and better results for lobby logos, door glass, donor walls, and architectural panels.
Limitations: Requires specialized equipment, controlled production space, careful masking, and experience to avoid uneven depth or edge damage.
Laser etching: best for intricate precision work
Laser etching uses a focused laser beam to mark the glass surface with precision. It is useful for fine linework, repeatable small components, detailed artwork, and pieces where computer-controlled consistency matters.
Materials needed:
- Laser etching machine (CO2 lasers are common)
- Computer with design software
- Protective eyewear
Advantages: Excellent precision, no physical contact during marking, repeatable production, and significantly faster production time for some small-format projects.
Limitations: Usually a surface-level frosted mark, limited depth, high equipment cost, and possible inconsistency depending on the glass composition.
How do you prepare glass for etching?
Preparation determines how clean the finished sign looks. Skipping the planning stage can lead to uneven etching, stencil bleeding, poor readability, or a design that looks good on screen but awkward once installed on glass.
Selecting the right glass
Choose glass that is smooth, stable, and appropriate for the location. Clear, frosted, and tinted glass often work well. Tempered glass can sometimes be etched, but it needs extra care because internal stress, edge condition, and fabrication sequence matter.
Avoid: Thin glass prone to cracking, glass with visible flaws or bubbles, and coated glass unless you know the coating is compatible with the etching method.
Designing your pattern
Whether you use a physical stencil for chemical or abrasive etching, or a digital file for laser work, the artwork needs to be crisp. Fine lines, tiny text, and low-contrast logos may need adjustment so the finished sign remains legible from normal viewing distance.
For commercial spaces in San Jose, Sunnyvale, Cupertino, or Milpitas, also think about sightlines. A conference room band should create privacy without making the interior feel closed off. A storefront logo should be visible from the sidewalk without blocking the merchandise, desk area, or interior lighting.
If you need help translating your logo or concept into an etchable design, our team at San Jo Sign Co can assist—reach out to discuss your project.
Safety precautions
Glass etching involves hazards regardless of method. Chemical etching creams can burn skin. Sandblasting creates airborne particles. Laser systems require proper ventilation and eye protection.
Always wear the correct protective gear, work in a properly ventilated area, and follow manufacturer safety guidelines. For installed commercial glass, it is usually better to involve a professional fabricator before attempting work on existing doors, panels, or tenant improvements.
How do you etch glass step by step?
Here is a practical walkthrough using chemical etching, the most accessible method for small samples, decorative pieces, and basic DIY projects:
- Clean the glass thoroughly. Use glass cleaner and a lint-free cloth to remove dirt, dust, oils, and fingerprints. Any residue can interrupt the etched finish.
- Position your stencil. Apply the stencil to the glass and check alignment before you press it down. Work from the center outward to remove air bubbles and prevent blurry edges.
- Apply etching cream generously. Use a brush to cover all exposed areas with an even layer. The cream must contact the glass fully to create a consistent mark. Avoid skin contact.
- Time the process carefully. Leave the cream in place according to manufacturer instructions, typically 5-15 minutes. Do not exceed the recommended time in an attempt to force a deeper finish.
- Rinse with cold water. Thoroughly wash away all etching cream. Remove the stencil carefully.
- Inspect before calling it finished. Check the glass from multiple angles and lighting conditions. Light or incomplete areas can sometimes be re-etched by reapplying the stencil and cream.
What advanced glass etching techniques exist?
Once the basics are understood, advanced etching can make glass signs more dimensional and better suited to commercial interiors.
Multi-layer etching creates depth by etching different parts of the artwork in separate passes. This requires precise stencil registration, but it can give logos and decorative panels a more dimensional look.
Combining etching with painting adds color to frosted areas. This can work for accent elements, but it should be planned around cleaning, viewing angle, and whether the sign is exposed to direct sunlight.
Deep carving removes more glass to create sculpted, high-relief effects. It requires professional sandblasting equipment and is usually reserved for higher-end architectural signage.
Etched privacy bands are common in offices, clinics, and studios because they balance visibility with discretion. In dense commercial areas around San Jose, Palo Alto, and Fremont, that can be just as important as the logo itself.
How do you maintain etched glass signs?
Etched glass is durable, but it still needs the right care, especially on doors, storefronts, and high-touch interior panels.
- Clean regularly with non-abrasive glass cleaner and soft cloths. Avoid scrubbing pads that can catch on the etched texture.
- Plan for fingerprints on entry doors, reception glass, and shared conference rooms. Etched areas can hold oils and dust differently than clear glass.
- Consider protection for exterior or semi-exterior installations where Bay Area sun, dust, moisture, and street exposure can affect appearance over time.
- Handle carefully during cleaning and maintenance because etched sections can be more vulnerable than untreated glass.
What can you create with etched glass?
Etched glass signs are useful across many San Jose and South Bay business settings:
- Business signage: Lobby logos, reception area displays, conference room names, suite identification, and storefront windows
- Privacy glass: Frosted bands for offices, clinics, studios, gyms, salons, and professional service firms
- Hospitality and retail: Restaurant partitions, boutique display glass, bar mirrors, and branded entry doors
- Residential and personal projects: Address panels, nameplates, decorative mirrors, and commemorative glass pieces
For complex commercial projects or when you want professional results without the DIY learning curve, start a project with San Jo Sign Co. We help with design consultation, fabrication planning, and project-specific professional installation in San Jose and the listed Silicon Valley service areas.
Troubleshooting common glass etching problems
Uneven etching: Usually caused by inconsistent cream application, incomplete cleaning, or air bubbles under the stencil. Clean the glass carefully and press stencil edges down firmly.
Stencil bleeding: Happens when etching cream or abrasive work creeps under the stencil edge, creating blurry lines. Use high-quality stencil material and check adhesion before production.
Weak readability: A design that looks sharp on a monitor can disappear on real glass if the lines are too fine or the background is too busy. Review contrast, lighting, and viewing distance before approving the artwork.
Glass damage: Cracking or chipping can result from excessive pressure, flawed glass, edge stress, or temperature changes during processing. Inspect the glass before etching and handle it gently throughout.
Ready to create your etched glass sign?
Glass etching turns ordinary glass into a permanent design surface with real everyday value. It can carry a logo, guide visitors, add privacy, or make a leased commercial space feel more finished without overwhelming the architecture.
For San Jose and Bay Area businesses planning etched glass signs, San Jo Sign Co can help with design, fabrication, and installation details. Start your project today when you are ready to turn the idea into a production-ready sign.