
Best Glue for Acrylic Sign Letters in San Jose: Adhesive and Mounting Guide
The right adhesive depends on the acrylic, the wall surface, and where the letters will live. Here is how to choose a bond that works for South Bay storefronts, offices, and interior signs.
Key takeaways
- Solvent-based acrylic cement is best when acrylic is bonding directly to acrylic because it chemically fuses the surfaces together.
- For acrylic letters mounted to painted drywall, metal, masonry, or existing sign panels, the substrate often matters more than the letter material.
- Epoxy and high-bond acrylic foam tape can work well for dimensional letters, but weight, surface area, and wall texture all affect the result.
- Outdoor and window-facing signs around San Jose need adhesives that tolerate heat, UV exposure, moisture, and daily temperature swings.
- Clean surfaces, test first, and allow the full cure time before stressing the letters or opening the space to regular traffic.
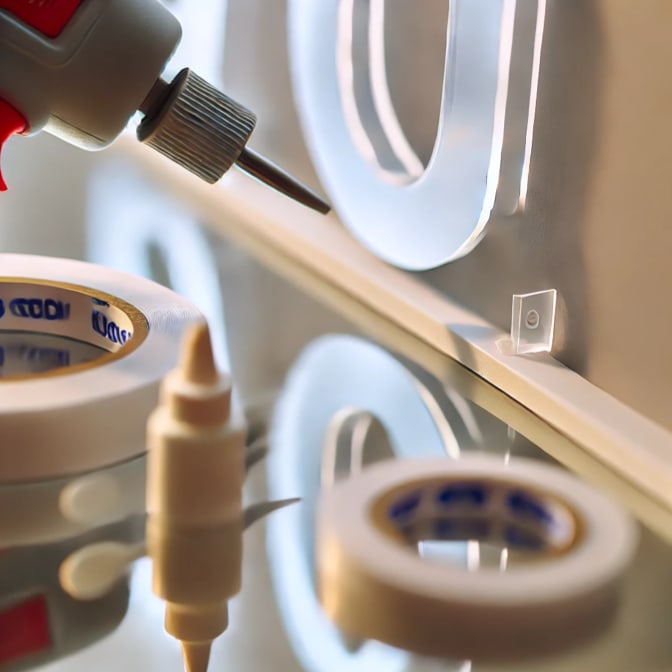
Choosing the right adhesive for acrylic sign letters is not just a shop-supply decision. The best glue depends on what the letters are made from, what they are being mounted to, whether the sign sits inside a lobby or faces the sun through a storefront window, and how much movement the wall or panel will see over time.
That matters for businesses across San Jose and the South Bay. A lobby logo in a Palo Alto office, a retail wall sign in Santa Clara, and exterior letters on a warm, south-facing storefront in Sunnyvale may all use acrylic, but they may not need the same adhesive or mounting method.
Why does acrylic require special adhesives?
Acrylic, also called plexiglass or PMMA, behaves differently from wood, metal, PVC, or painted drywall. General-purpose glues may seem to grab at first, then release later or leave cloudy marks called "crazing" on polished and clear acrylic. That is a problem when the whole point of dimensional letters is a clean, finished face and crisp edges.
The strongest acrylic-to-acrylic bonds usually come from solvent welding. Instead of sitting between two pieces like ordinary glue, the solvent softens the acrylic surfaces and fuses them as it evaporates. Done correctly, the joint can be very strong and nearly invisible. Done carelessly, it can drip, haze, or permanently scar the letter face.
For many real sign installations, though, the bigger question is not only "what sticks to acrylic?" It is "what sticks acrylic to this wall, panel, tile, glass, painted surface, or exterior facade?" That is where adhesive choice gets more practical.
What are the best adhesive options for acrylic letters?
Several adhesive categories can work for acrylic sign letters. The right one depends on the letter thickness, weight, surface area, visibility of the bond line, and whether the installation is temporary, permanent, indoor, or outdoor.
Solvent-based acrylic cement: the professional standard
Products like Weld-On 3, Weld-On 4, and Weld-On 16 are common choices for acrylic fabrication. Thin solvent cements wick into tight acrylic joints by capillary action, while heavier-bodied formulas can be easier to control on some assemblies.
Best for: Acrylic letters bonded to acrylic backer panels, layered acrylic logos, display pieces, and shop fabrication where the pieces can be aligned on a bench.
Limitations: Solvent cement is not a gap-filling wall adhesive. It needs tight contact, good control, ventilation, and practice. On finished letters, one drip can leave a visible scar.
Epoxy resin: the heavy-duty option
Two-part epoxy can provide strong holding power when acrylic letters need to bond to another material, such as metal, wood, or a properly prepared painted panel. It creates a mechanical bond rather than a true acrylic weld, which makes it more flexible for mixed-material signs.
Best for: Heavier dimensional letters, letters with limited contact points, mixed-material assemblies, and installations where small gaps need to be bridged.
Limitations: According to acrylic bonding research, epoxy can yellow with UV exposure, so it is not ideal where the bond line will show through clear acrylic. It also needs accurate mixing, steady support, and enough cure time before the letters are loaded.
Acrylic adhesive tape: the clean alternative
High-bond acrylic foam tapes, including VHB-style tapes, are often useful for clean interior installations. Tape gives immediate placement support while the adhesive builds strength over time. It can also help avoid squeeze-out, fumes, and visible glue marks.
Best for: Lightweight to medium-weight letters, smooth painted panels, office wall logos, reception signs, and installs where a neat back side matters.
Limitations: Tape needs enough surface area and a compatible surface. Textured paint, dusty masonry, low-energy coatings, or freshly painted walls can reduce adhesion. On heavier letters, tape may be paired with studs or another mechanical method.
Silicone adhesive: the flexible performer
Silicone-based adhesives can be useful where movement and weather exposure are part of the installation. In the Bay Area, storefront signs may deal with cool mornings, warm afternoon sun, moisture, cleaning chemicals, and repeated expansion and contraction. A flexible adhesive can absorb some of that movement.
Best for: Select outdoor applications, sign panels that need weather resistance, and installs where a small amount of flexibility helps reduce stress.
Limitations: Silicone is not usually the strongest option by itself. It can dry translucent or opaque, needs a long cure time, and may not look clean if it is visible behind clear acrylic.
Cyanoacrylate (super glue): the quick fix
Super glue bonds quickly, which makes it tempting for small repairs. For commercial sign letters, that speed is usually the main benefit. The cured bond can be brittle, and the fumes can leave white "blooming" on clear or glossy acrylic.
Best for: Tiny repairs, noncritical test pieces, and temporary holds during fabrication.
Limitations: Not recommended as the main adhesive for permanent acrylic sign letters, exterior signage, or heavy dimensional pieces.
How do you apply adhesive to acrylic letters correctly?
Good installation technique matters as much as the adhesive label. Before mounting letters in a San Jose storefront, Mountain View office, Cupertino clinic, or Fremont retail space, check both the acrylic and the wall surface.
- Clean all surfaces thoroughly: Remove dust, fingerprints, oils, and construction residue. Isopropyl alcohol is often used on compatible surfaces, but painted walls and specialty finishes should be checked first.
- Confirm the substrate: Painted drywall, glass, tile, aluminum composite panels, masonry, and acrylic backers all behave differently. The same adhesive may perform well on one surface and poorly on another.
- Test on scrap material first: Test the adhesive on leftover acrylic or a hidden sample area to check bond strength, haze, squeeze-out, and cure behavior.
- Apply adhesive sparingly: More adhesive does not automatically mean a better bond. Excess solvent cement can run, epoxy can create a visible bead, and silicone can squeeze out past the letter edge.
- Support the letters while curing: Use a template, tape, clamps, spacers, or temporary bracing as appropriate so letters do not creep out of alignment before the bond sets.
- Allow full cure time: Handling strength and full strength are not the same thing. Give the adhesive enough time before cleaning around the sign, opening nearby doors repeatedly, or putting stress on the letters.
Which adhesive should you choose for your project?
Acrylic letters are used in many different sign types, from interior reception logos to exterior suite signs. Use the project conditions to narrow the choice:
- Acrylic letters on acrylic backing: Solvent cement such as Weld-On 4 is often the cleanest permanent choice when the parts fit tightly.
- Acrylic letters on smooth interior walls: High-bond acrylic foam tape, adhesive designed for plastics, or a stud-mounted approach can work depending on letter weight and wall finish.
- Heavy dimensional letters: Two-part epoxy, studs, pads, or a combined mechanical and adhesive mounting method may be needed.
- Outdoor signage: Choose for weather resistance, movement, and the actual mounting surface. Exterior letters often should not rely on adhesive alone.
- Temporary or landlord-sensitive installations: Review the property criteria first. Removable tape or lower-impact mounting may be appropriate, but it must still be safe and stable.
What changes for San Jose and South Bay installations?
Local conditions are practical, not mysterious. A sign near a glass storefront on Stevens Creek Boulevard, a tech office in North San Jose, or a small retail space in Milpitas may see different heat, glare, cleaning routines, and wall finishes than a protected interior sign. Direct sun through glass can warm acrylic and soften some adhesive systems. Fresh paint can outgas. Textured walls reduce contact area. Exterior walls may introduce moisture and surface movement.
Landlords and property managers can also affect the mounting plan. Some spaces prefer signs that can be removed with limited wall repair, while others require a more permanent installation. That does not automatically decide the adhesive, but it does shape the conversation before fabrication starts.
Ready to install professional acrylic signage?
Adhesive selection is only one part of a successful acrylic sign. Letter thickness, mounting pattern, wall prep, templates, spacing, and cure time all affect whether the finished sign looks sharp and stays put.
San Jo Sign Co fabricates custom acrylic letters and quotes installation in San Jose and the listed Silicon Valley service areas. If you need help choosing materials, mounting methods, and professional installation, we can help you plan the sign before anyone reaches for the glue.
Start your project to discuss your signage needs, or explore our custom acrylic sign options to see what fits your space.