
Vinyl Graphics in San Jose: Getting a Clean Look Without the Headaches
A practical guide to applying vinyl graphics for storefronts, vehicles, and windows in San Jose, from surface prep and tools to weather timing, bubble fixes, and durable edges.
Key takeaways
- Clean glass, painted metal, acrylic, or vehicle panels with 70% isopropyl alcohol before applying vinyl; dust, wax, and grease are the usual causes of bubbles and lifting.
- Use a low squeegee angle with overlapping strokes so air moves toward the edge instead of getting trapped under the graphic.
- Plan San Jose vinyl installs around surface temperature, not just the weather forecast; direct sun can make glass and metal too hot before midday.
- Use felt-edged tools on delicate finishes, window films, and printed graphics to avoid scuffs.
- Heat helps vinyl wrap curves and edges, but too much heat can overstretch the film and weaken the final bond.
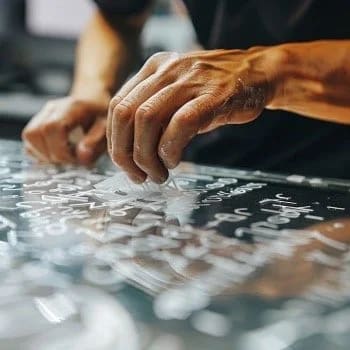
Vinyl graphics are one of the most flexible ways to update a storefront, vehicle, lobby wall, or temporary promotion without replacing the whole sign system. A clean window decal can make a Downtown San Jose storefront easier to spot from the sidewalk. Vehicle lettering can turn a service van into a moving identifier across Santa Clara, Sunnyvale, Mountain View, and Milpitas. The catch is that vinyl is not forgiving when the surface, weather, or installation technique is ignored.
If you have ever applied a graphic and watched bubbles, wrinkles, or lifting edges appear a few hours later, the problem usually started before the vinyl touched the surface. Whether you are working with car window decals, storefront lettering, wall graphics, or large-format promotional signage, the same basics matter: clean prep, steady pressure, the right temperature, and a realistic plan for edges, curves, and curing time.
Why does surface preparation matter so much?
Surface prep is the part of vinyl application that looks boring and decides almost everything. Dust, oil, old adhesive, wax, silicone residue, and even fingerprints can keep the adhesive from making full contact. On storefront glass near busy corridors like Stevens Creek Boulevard, The Alameda, North First Street, or El Camino Real, road film and fine dust can collect quickly. On vehicles, wax and detail sprays are common culprits.
Start by washing off loose dirt, then clean the application area with 70% isopropyl alcohol and a lint-free microfiber cloth. The goal is to remove contamination without leaving a film behind. Household glass cleaners can be useful for normal maintenance, but many are not ideal right before vinyl because they may leave surfactants or fragrance residue on the surface.
According to Coverstyl's vinyl application guide, adhesion depends on surface cleanliness, adhesive quality, and installation conditions. That matters for San Jose-area businesses because the same graphic may be applied to glass, painted aluminum, acrylic panels, drywall, or a vehicle panel, and each surface behaves differently.
For lightly textured, oxidized, or rough surfaces, clean vinyl application may require more than wiping. Old adhesive may need careful removal. Lightly corroded metal may need prep before it can hold a graphic reliably. Painted walls should be fully cured and free of loose paint. If the surface is questionable, test a small area first instead of committing the full graphic.
What tools do you need for vinyl application?
The right tools keep the job controlled. For a small decal, the list is short. For a storefront, fleet graphic, or wall installation, missing tools usually show up as crooked alignment, scratched film, or ragged trimming.
- Squeegee: This is the main pressure tool. Felt-edged squeegees help protect printed vinyl, matte finishes, gloss films, and window graphics from scratches. Harder edges can be useful for firm final passes on tougher surfaces.
- Transfer tape: Cut vinyl lettering and logos need transfer tape to hold spacing and alignment while the graphic is positioned.
- Heat gun or hair dryer: Heat helps vinyl conform to curves and can improve edge adhesion. A heat gun gives more control, but it also makes it easier to overheat the film if you are not careful.
- Precision blade: Clean trimming depends on a sharp blade. A dull blade pulls at the vinyl, damages edges, and can scratch the substrate underneath.
- Measuring tape and level: A graphic that is only slightly off can look obvious on glass doors, reception walls, and vehicle panels. Mark light reference points before removing backing paper.
- Masking tape: A simple hinge made from tape can hold a graphic in place while you peel and apply one side at a time.
How should you hold the squeegee?
Squeegee technique is where many otherwise careful installs go sideways. According to Elite Wrappers' professional guide, a low squeegee angle helps apply consistent pressure without forcing the vinyl into wrinkles. A vertical, 90-degree angle tends to press down rather than push air out.
Work from the center outward with overlapping strokes. Think of each pass as moving air toward an exit. Do not curl down hard at the end of a stroke, because that uneven pressure can trap a crescent-shaped bubble near the edge. Keep the squeegee moving smoothly and use enough pressure to bond the vinyl without stretching it.
For larger graphics, use a tape hinge so the vinyl stays aligned while the backing paper is removed gradually. Apply one section first, check alignment, then continue. This matters on storefront windows in places like Willow Glen, Santana Row, Japantown, and Palo Alto where a slight tilt can stand out against door frames, mullions, and window grids.
What is the best temperature for vinyl application in San Jose?
Temperature affects how vinyl handles and how well the adhesive bonds. A common application range is 59°F to 81°F (15°C to 27°C), but the important number is the temperature of the surface, not only the air. A window in direct sun can become much hotter than the forecast suggests. A metal vehicle panel can do the same in a parking lot.
In cold conditions, the adhesive may not activate well and the vinyl becomes stiff. In high heat, the vinyl can soften, stretch, or grab too quickly, making repositioning difficult. For South Bay storefronts, shaded morning windows are often easier to work on than late-afternoon glass that has been absorbing sun for hours.
Humidity and wind matter too. A breezy outdoor install can blow dust under the film at the worst moment. Moisture on glass can interfere with the bond. A controlled indoor environment is best when available, especially for fleet decals, wall graphics, and graphics that need precise registration.
How do you fix air bubbles?
Even careful application can leave a few bubbles. The fix depends on the size and the material:
- Small bubbles: Use a fine needle or pin to make a tiny puncture, then smooth the air out with a squeegee. Keep the puncture small so it does not become visible.
- Large bubbles: If the vinyl has not fully set, lift it carefully from the nearest edge and reapply with overlapping strokes. Pulling from the center can stretch the film and make the problem worse.
- Stubborn bubbles: Apply gentle heat, then smooth with a felt-edged squeegee. Use heat sparingly, especially on printed graphics or thin films.
Many premium vinyl materials include air-release channels that let small bubbles settle out over time. That does not replace careful technique, but it can make large storefront or vehicle graphics more forgiving than basic calendared film.
How do you apply vinyl around curves and edges?
Curves, recesses, door seams, window gaskets, and panel edges are where lifting usually begins. This is especially important for vehicle graphics used by contractors, delivery teams, real estate businesses, and service companies driving between San Jose, Fremont, Cupertino, and Mountain View. Edges take the most abuse from washing, sun, and repeated handling.
- Apply the flat portions first, then work gradually toward the curve or edge.
- Warm the vinyl lightly with a heat gun. The film should become more flexible, not hot enough to feel uncomfortable.
- Use a felt-edged squeegee and short, overlapping strokes to guide the softened vinyl into shape.
- Stretch only where needed. Overstretched vinyl becomes thinner and is more likely to lift, fade unevenly, or fail at the edge.
For deeper recesses, relief cuts may be needed to reduce tension. For public-facing graphics, those cuts should be planned so they do not interrupt the visual design. A clean edge is not just about appearance; it helps the graphic stay put after cleaning and weather exposure.
What finishing steps ensure durability?
Once the vinyl is down, the finishing steps help decide how long it looks clean:
- Post-heat high-stress areas where the vinyl wraps around curves, edges, or recesses. This helps the adhesive settle into the final shape.
- Trim excess material cleanly with a sharp blade, cutting away from finished edges and gaskets when possible.
- Seal vulnerable edges on outdoor signage, vehicle graphics, or graphics exposed to frequent cleaning.
- Allow 24 to 72 hours for the adhesive to cure before washing, pressure washing, or heavy handling.
For storefront graphics, also consider the business environment. A cafe door, salon window, gym entrance, or medical office suite may be touched and cleaned every day. Graphics near handles, lower glass, or high-traffic edges need more careful finishing than graphics placed higher on a window.
What mistakes should you avoid?
Most vinyl problems are preventable. Watch for these common mistakes:
- Rushing surface prep: Skipping cleaning is the fastest way to get bubbles, lifting, or early failure.
- Installing on hot glass or metal: Direct sun can make the adhesive grab too fast and can cause stretching during application.
- Using the wrong squeegee angle: Pressing straight down traps air instead of pushing it out.
- Overstretching the film: Stretched vinyl is thinner and more likely to pull back from edges.
- Ignoring landlord or site requirements: For storefronts, review lease guidelines, property rules, and any local sign review needs before ordering graphics.
- Skipping a test patch: Test unfamiliar surfaces, fresh paint, textured walls, and older glass before applying a full graphic.
When should you hire a professional?
DIY vinyl application can work well for small, flat, low-risk graphics. It becomes more complicated when the graphic is large, visible from the street, part of a brand rollout, or installed on a surface that is not perfectly flat. Storefront windows, fleet vehicles, reception walls, and multi-panel graphics all leave less room for improvising.
Professional installation services also help with sequencing. For a San Jose storefront, that may mean coordinating with property management, choosing a time when the glass is shaded, protecting pedestrian access, and making sure the final placement works with doors, mullions, hours, logos, and sightlines. For fleet graphics, it can mean staging vehicles indoors so the work is consistent across multiple units.
The best vinyl graphics do not call attention to the installation. They look straight, smooth, intentional, and easy to read from the distance where customers actually see them. That result comes from good design, the right material, and patient application from the first cleaning pass to the final edge check.